Roofing installation is important to protect your home from the elements. Find a professional who is experienced with the type of roof you are replacing and has a good reputation in your community.
Checking for licensing and insurance is also a must. Ask contractors to provide proof of both and look up reviews online.
A sturdy roof protects your home from the elements, including wind, rain, snow, and extreme temperatures. It also keeps moisture from seeping into your house, causing wood damage and encouraging mold and mildew to grow. The right roofing materials will protect for years to come while still allowing you to enjoy the beauty of your home’s exterior.
There are many different roofing materials available to suit the needs of your home, from traditional asphalt shingles to clay tiles. Metal shingles are another popular option and can be made to look very similar to conventional shingle or shake styles. They are extremely durable and have a life expectancy of 30 to 50 years.
Rolled roofing is a cost-effective alternative for low-slope residential roofs and sheds. It consists of large rolls of asphalt-impregnated material topped with mineral granules. It can be applied to sloped roofs using a torch-down method or with roofing nails and is a good choice for those on a budget.
Fibre cement roof sheets are an excellent alternative to rolled roofing and can be used on sloped or flat roofs. They have a long lifespan and are available in a range of colours to match any building design. They are particularly suited to rural areas and domestic builds, but can be used in more modern buildings as well.
If you have a sloping roof, it’s recommended that you use a roof leak barrier to help prevent leaking during cold weather. Products like GAF WeatherWatch have a mineral surface that prevents damaging leaks in eaves and valleys and around penetrations. It is also important to use tarps to cover the ground under your work area to catch stray shingles, nail and wood shavings during demolition and clean up.
Drip Edges and Flashing
When it comes to protecting your roof and fascia from rot, drip edges are one of the most important roofing installation components. Without them, water that runs off your roof will soak into the fascia board and rot it out. Drip edges keep the water away from the fascia boards, allowing it to drain into gutters and prevent structural damage.
Drip edges are made of a variety of materials, including aluminum, galvanized steel, copper and more. The most common is aluminum because it’s lightweight, doesn’t rust, and can be painted to match your roof’s color. Galvanized steel is a bit more expensive, but it’s durable and able to withstand high winds. Copper is a premium option that adds an elegant, unique look to your home.
The type of drip edge you choose depends on your needs and budget. The simplest is the “L-style” drip edge, also known as Type C drip edge. It’s an L-shaped piece of metal bent at a 90-degree angle with a flange or lower edge. The F-style or gutter apron drip edge has a longer leading edge and is designed to direct the water over the existing gutter (hence the name).
There are other types of drip edges, but they’re more complicated and typically reserved for specialty projects. For most residential roofing, a Type C drip edge will do the trick.
Underlayment
The underlayment is the layer between your roof deck and the shingles. It’s not as visible as the shingles are, but it protects against rain, snow, and wind that could lift and break the shingles. It prevents water leakage that could lead to wood rot, mold, and structural damage.
Builders use three main types of underlayment: felt, self-adhered, and synthetic. The type of underlayment you use depends on your roofing contractor’s preferences and local building codes.
Felt underlayment is one of the oldest forms of roofing underlayment. It is composed of an organic paper or mat saturated with asphalt to help it hold up to weather and moisture. Typically, builders use 15- or 30-pound felt. It offers an affordable price for lightweight projects, but it’s not waterproof and can tear easily.
Synthetic underlayment is a more durable option than felt, but it’s also expensive. It’s a non-bitumen membrane that can be rolled out or cut to the right size. It’s more flexible, resistant to tears, and offers a better performance in high-temperature environments. In addition, it presents more of an air barrier and helps with ice dam protection than traditional felt underlayment.
A self-adhering membrane is similar to synthetic underlayment but has a sticky back that allows it to be laid down directly onto the roof deck. It’s often used over the eaves and valleys of the roof because it can prevent water leaks in these sensitive areas. Builders usually nail the underlayment in a pattern that’s closer around the edge and spreads out more towards the middle of the underlayment. Then they will overlap the first row of underlayment with the second and fasten them together using button cap nails.
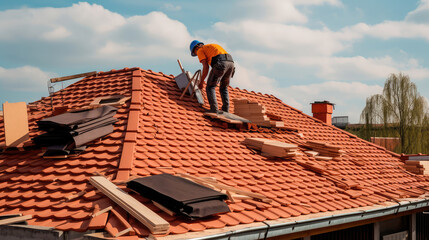
Shingles
If you have skylights, chimneys or vents on your roof you’ll want to install the proper flashings before you start layering on the shingles. These are usually thin pieces of metal that are designed to cover cracks or gaps in the shingle layer and create a tight seal around whatever structure it’s covering. This also helps to prevent moisture from seeping in and causing damage.
Another special area that needs to be covered is the ridge cap. There are specialized shingles that go up over the peak of your roof to keep rain, snow and ice from leaking through these areas. This is a very important step that should be completed properly to ensure your roof is watertight.
You’ll also want to complete any needed valley flashing before laying the shingles. Valleys are the spots where two shingle layers meet, and they are often a leak-prone spot on a roof. They should be lined with a pre-formed width of corrosion resistant metal, which is called valley flashing.
This is an excellent time to replace or cut new vents into your roof, too. Make sure they are nailed into the roof correctly so that they don’t come loose in storms. You’ll want to nail them down with four roofing nails per shingle, as indicated on the package instructions.
As you continue to lay the shingles, remember that each row should be overlapped with the previous one. This will keep the shingle layers from blowing away in high winds and also prevent water from getting between the layers and causing damage to your roof. In addition, each shingle should be nailed down so that it is flush with the shingle beneath it and not hanging over the edge of the roof.
Clean Up
A reputable roofing contractor will take the time to do a thorough clean up after finishing their work on your roof. This includes removing all materials, tools, and equipment and making sure that your property is restored to its original condition. This can include trimming bushes, cleaning out gutters, and sweeping the entire area. They will also do a final inspection of the new roof to make sure it has been installed correctly and meets all necessary standards.
While the roofers are working on your roof, it is important to keep kids and pets away from the construction site. This is because nails, shingle debris, and other building materials may fall to the ground, creating potential hazards. Additionally, the vibrations from the hammers hitting the roof can damage items inside your home, such as windows and doors.
It is also a good idea to move any outdoor furniture, grills, or lawn ornaments away from the immediate construction area. This will help to protect them from falling debris and will make it easier for the roofers to access power outlets to run their machinery.
It is also important to check for tar stains on the siding, gutters, and sidewalks. These stains can cause permanent discoloration and premature rusting of metal roof surfaces.